We’ve all seen it. The photo of your gorgeous friend on Facebook who doesn’t need ANY help to look beautiful…but her eyes are brightened unnaturally, her teeth are whiter than white, and her skin’s contours have been airbrushed so much that she looks more like a robot than the naturally vibrant girl she is.
Now, how someone personally edits their own photos has nothing to do with me – but as a professional photographer, it is my job to make sure that my clients look as beautiful as I see them. And for a long time, (before I started my business) I was one of those editors. My overeager brain sounded a lot like “Oooh airbrush! Brighten up those eyes! Gotta make sure those pearly whites are way whiter than they are in real life in order for this photo to be beautiful!”
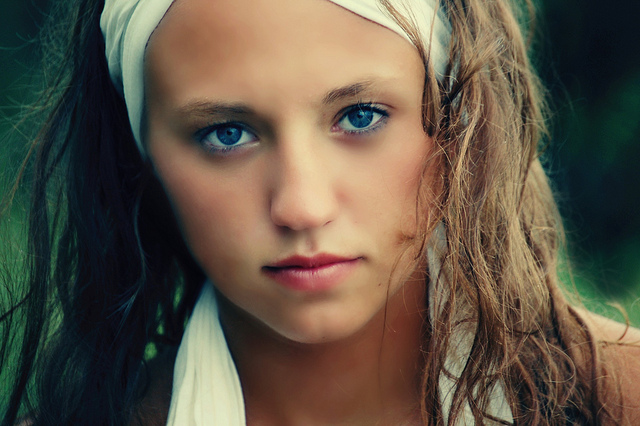
This a photo of my dear friend Katie from 2010… bless her heart! She put up with me in my stages of over-editing, as you can clearly see below. I was definitely guilty of all the editing faux paus, and thankfully she’s stuck with me long enough that I’ve moved on! You can see some recent photos I shot of her here.
I also went through the excellent stage where I over-colorized everything. Super blue, super brown, there was no happy medium. I felt like adding an obvious vignette, some grain, and a brown tone would take my photo from good to ART!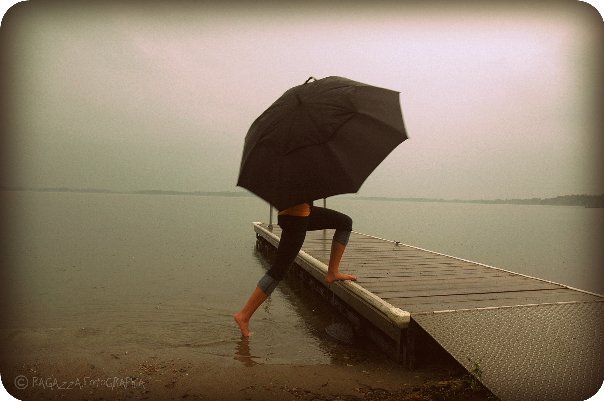
The non-edited version of this photo made it into a “Best of College Photography” journal when I was a sophomore in high school. Had I sent this version in, it certainly would’ve been thrown in the pile of millions of other poorly edited shots that were better left alone.
The point of me sharing these old photos is to reinforce the fact that I was 100% guilty of tainting otherwise usable photos by layering countless editing effects over them. I was guilty of taking photos of my beautiful friends and not realizing that they didn’t need crazy computer-run cosmetic surgery for that photo to make an impact.
I guess what I’m trying to stress is this: let your photos breathe. Expose them correctly in camera so you don’t have to perform surgery on them in order to make them presentable. And yes, enhance what is naturally there – but don’t stifle it.
My editing process now is this: Brighten, increase contrast, sharpen ever so slightly. Yep, it’s that simple. Because my beautiful clients need me to see the best in them and bring it out, not cover it up!
**Let me know if you relate/related to my editing struggles early on, or if you’d like to see some before and after photos from recent shoots to further illustrate my process!
[…] about my editing process which has a lot of good information in it, and that same year shared some truly cringe-worthy edits that I did when I was just starting out as a […]
[…] month or two ago, I wrote a post about the process of editing that most photographers go through, and I included some of my […]
Mariah – I know it’s always helpful/encouraging for me to remember that everyone started somewhere, and most of the time it wasn’t pretty! Thanks for your feedback!
Rachel – Glad to hear I can be of some help! I love keeping tabs on other photogs…it’s one of the biggest ways that I learn and grow!
I am by no means a professional, but am always looking for ideas, models, and clients and love looking at your work. I definitely have learned some of the same editing mistakes that you have, some just from watching other photographers work. Even though I’m still learning, I definitely related to this. My editing has become much more simple as well. I try to make photos that will speak for themselves. I love looking at your work and seeing where mine needs improvement!
I have always wondered if you just started out as good as you are now. I appreciate your honesty! I am still trying to figure out my editing style. I’m thankfully past the over airbrushing stage, or the dramatically edited eyes. Thanks for sharing your story and tips!